REST APIs
Healthbot ships with an API Gateway, this is leveraged by the Healthbot Graphical User Interface. The same APIs can be invoked directly by users to build applications that can be enriched by information available within Healthbot.
This guide provides an overview of a tool, Postman, and some examples, that can be used to demonstrate the APIs that exist within Healthbot.
REST
REST is an overloaded term, in the context of Healthbot it can be viewed as a solution for exposing information via HTTP for consumption by third parties.
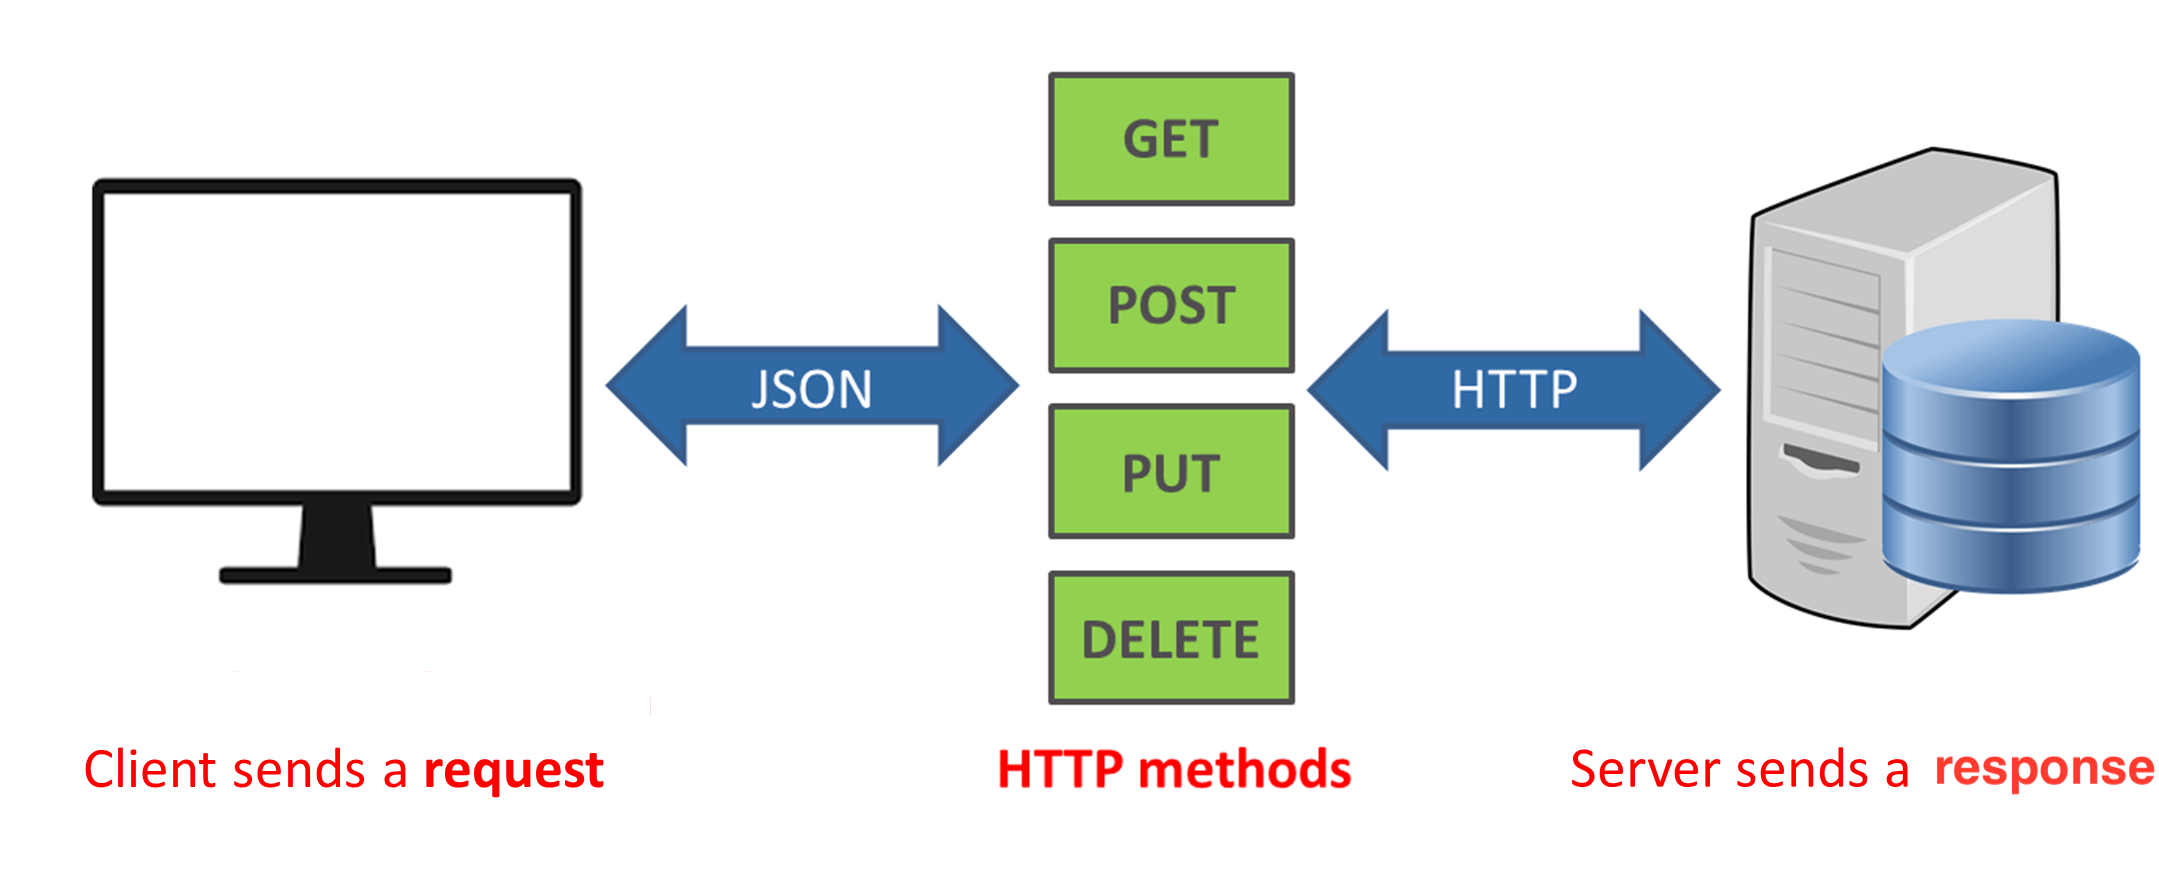
For a more detailed definition and the source of the image above, see What is REST API?
Postman
Postman is currently one of the most popular tools used in API testing.
Being an Open Source tool, Postman can be easily downloaded and installed from here https://www.getpostman.com/downloads/
As part of the installation, the installer will ask the user to sign up for an account, for our purposes, this is not needed and can be skipped.
Postman started out making REST Requests against API Servers (specifically the functionality were using), it has since then added cloud functionality to broaden its appeal in a cross team environment. Since we are only using the core functionality (making REST Requests) there is no need for the user to register against their cloud service for our scenarios.
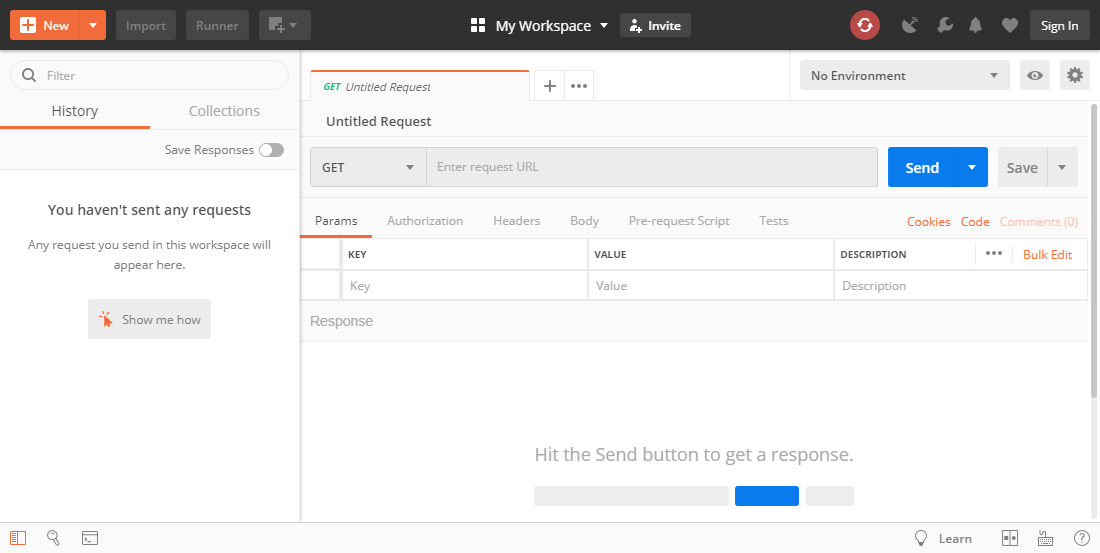
Once the installation completes, the startup screen will look as follows.
First Request
We will begin by making a request against Healthbot to retrieve information, if you reviewed the material at What is REST API you will know that this is a HTTP GET Request. To make this request we will need the following information.
- Healthbot Server IP Address and Port
- Healthbot Username and Password
- URL for a Healthbot Resource that we want to retrieve information about
However, before beginning, we need to modify the default configuration in Postman to allow it to make calls against servers with self signed certificates. To do this open Postman -> Preferences / Settings -> General and disable SSL Certificate Validation.

This is a one time task, once this is completed we create a new request by using the information collected above to invoke a REST call against our Healthbot Server instance.
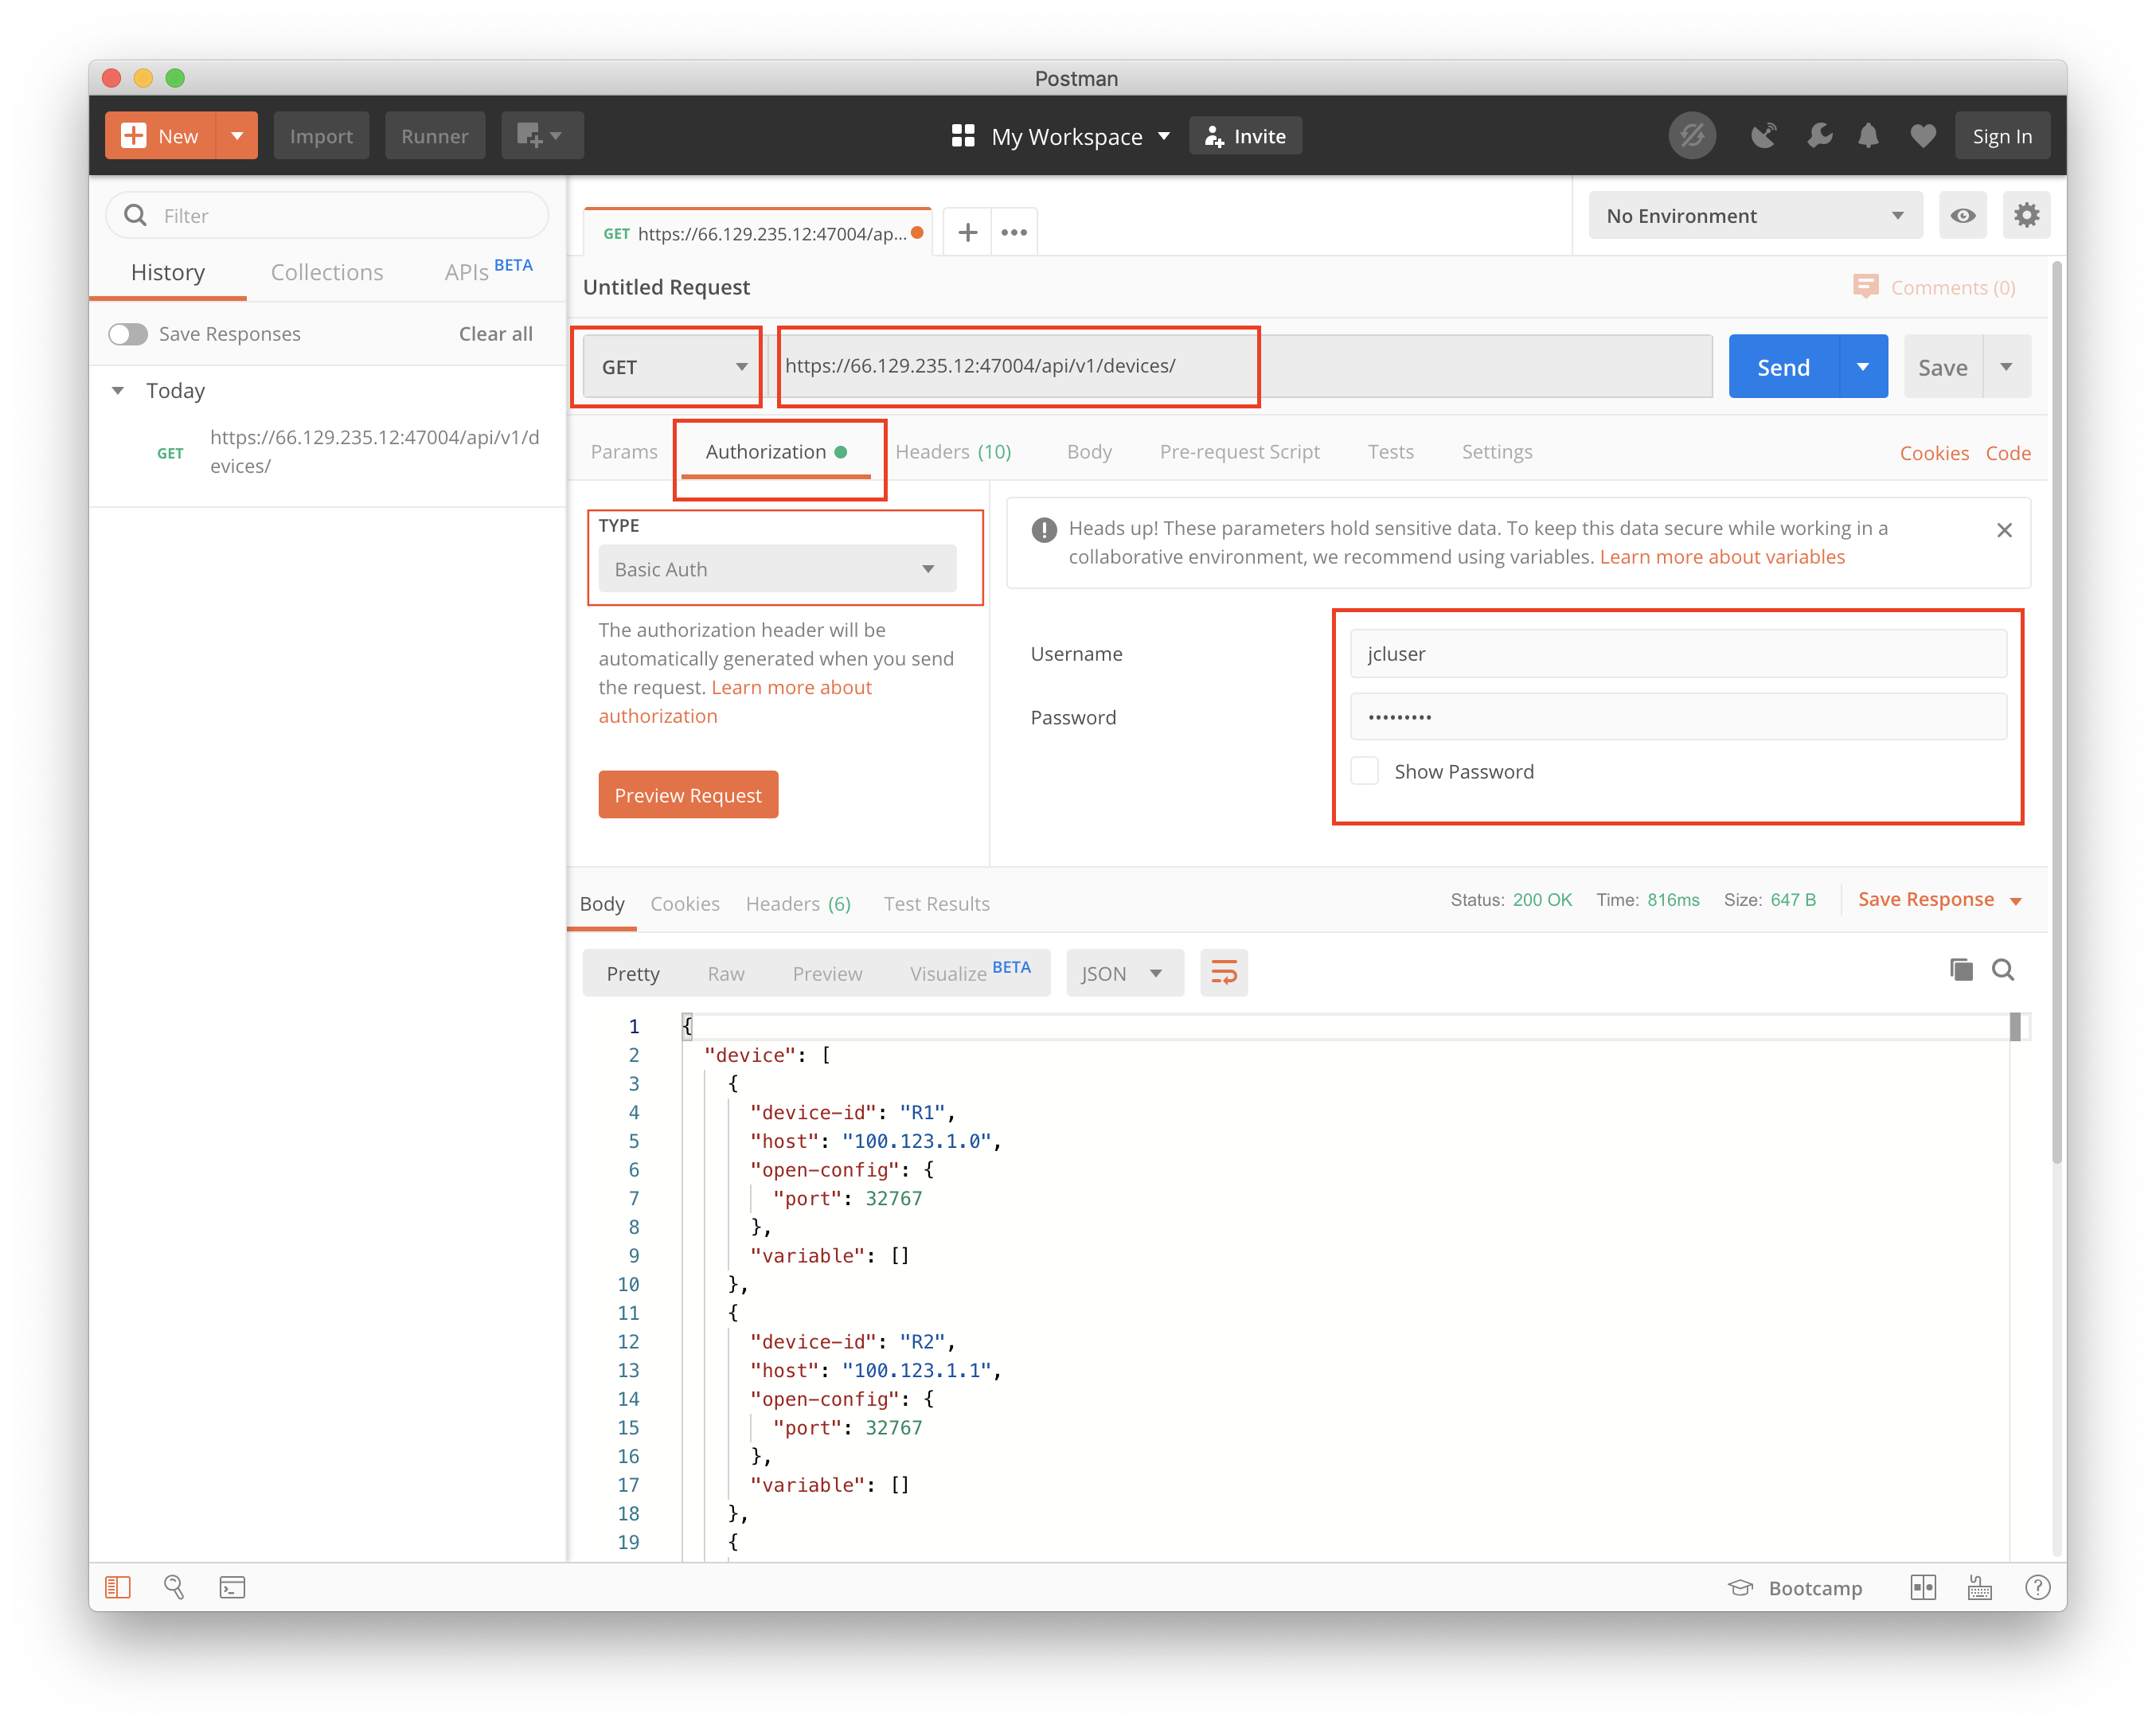
From the screenshot you can see that we selected the HTTP Verb GET, provided a URL that contains the server-ip:port(66.129.235.12:47004) as well as the URI /api/v1/devices/ and that in the Authentication Tab we selected Basic Auth from the drop down menu and added our credentials(username: jcluser) for the Healthbot instance.
Assuming that the details are correct, we get a valid response back containing a JSON representation of the registered Devices, see below for an example from my server.
{
  "device": [
    {
      "device-id": "R1",
      "host": "100.123.1.0",
      "open-config": {
        "port": 32767
      },
      "variable": []
    },
    {
      "device-id": "R2",
      "host": "100.123.1.1",
      "open-config": {
        "port": 32767
      },
      "variable": []
    },

    ...
You can see from the returned response, that the Devices Resource contains information pertaining to the configuration screen for Devices for e.g. the id, host, protocol ports used for telemetry, etc.
Healthbot Collection
Each instance of Healthbot includes full documentation of the available REST APIs, these can be viewed on your server at https://<server:port>/api/v1/
Postman provides a way of defining a number of API Requests and bundling these in what it calls a collection. This guide includes a Collection for a number of the common Healthbot API Requests. The Collection is available for import into Postman.
To import the Collection into Postman, first save this file locally, then in Postman, click the Import button in the header bar. In the IMPORT modal, select the Collection JSON file to upload it.
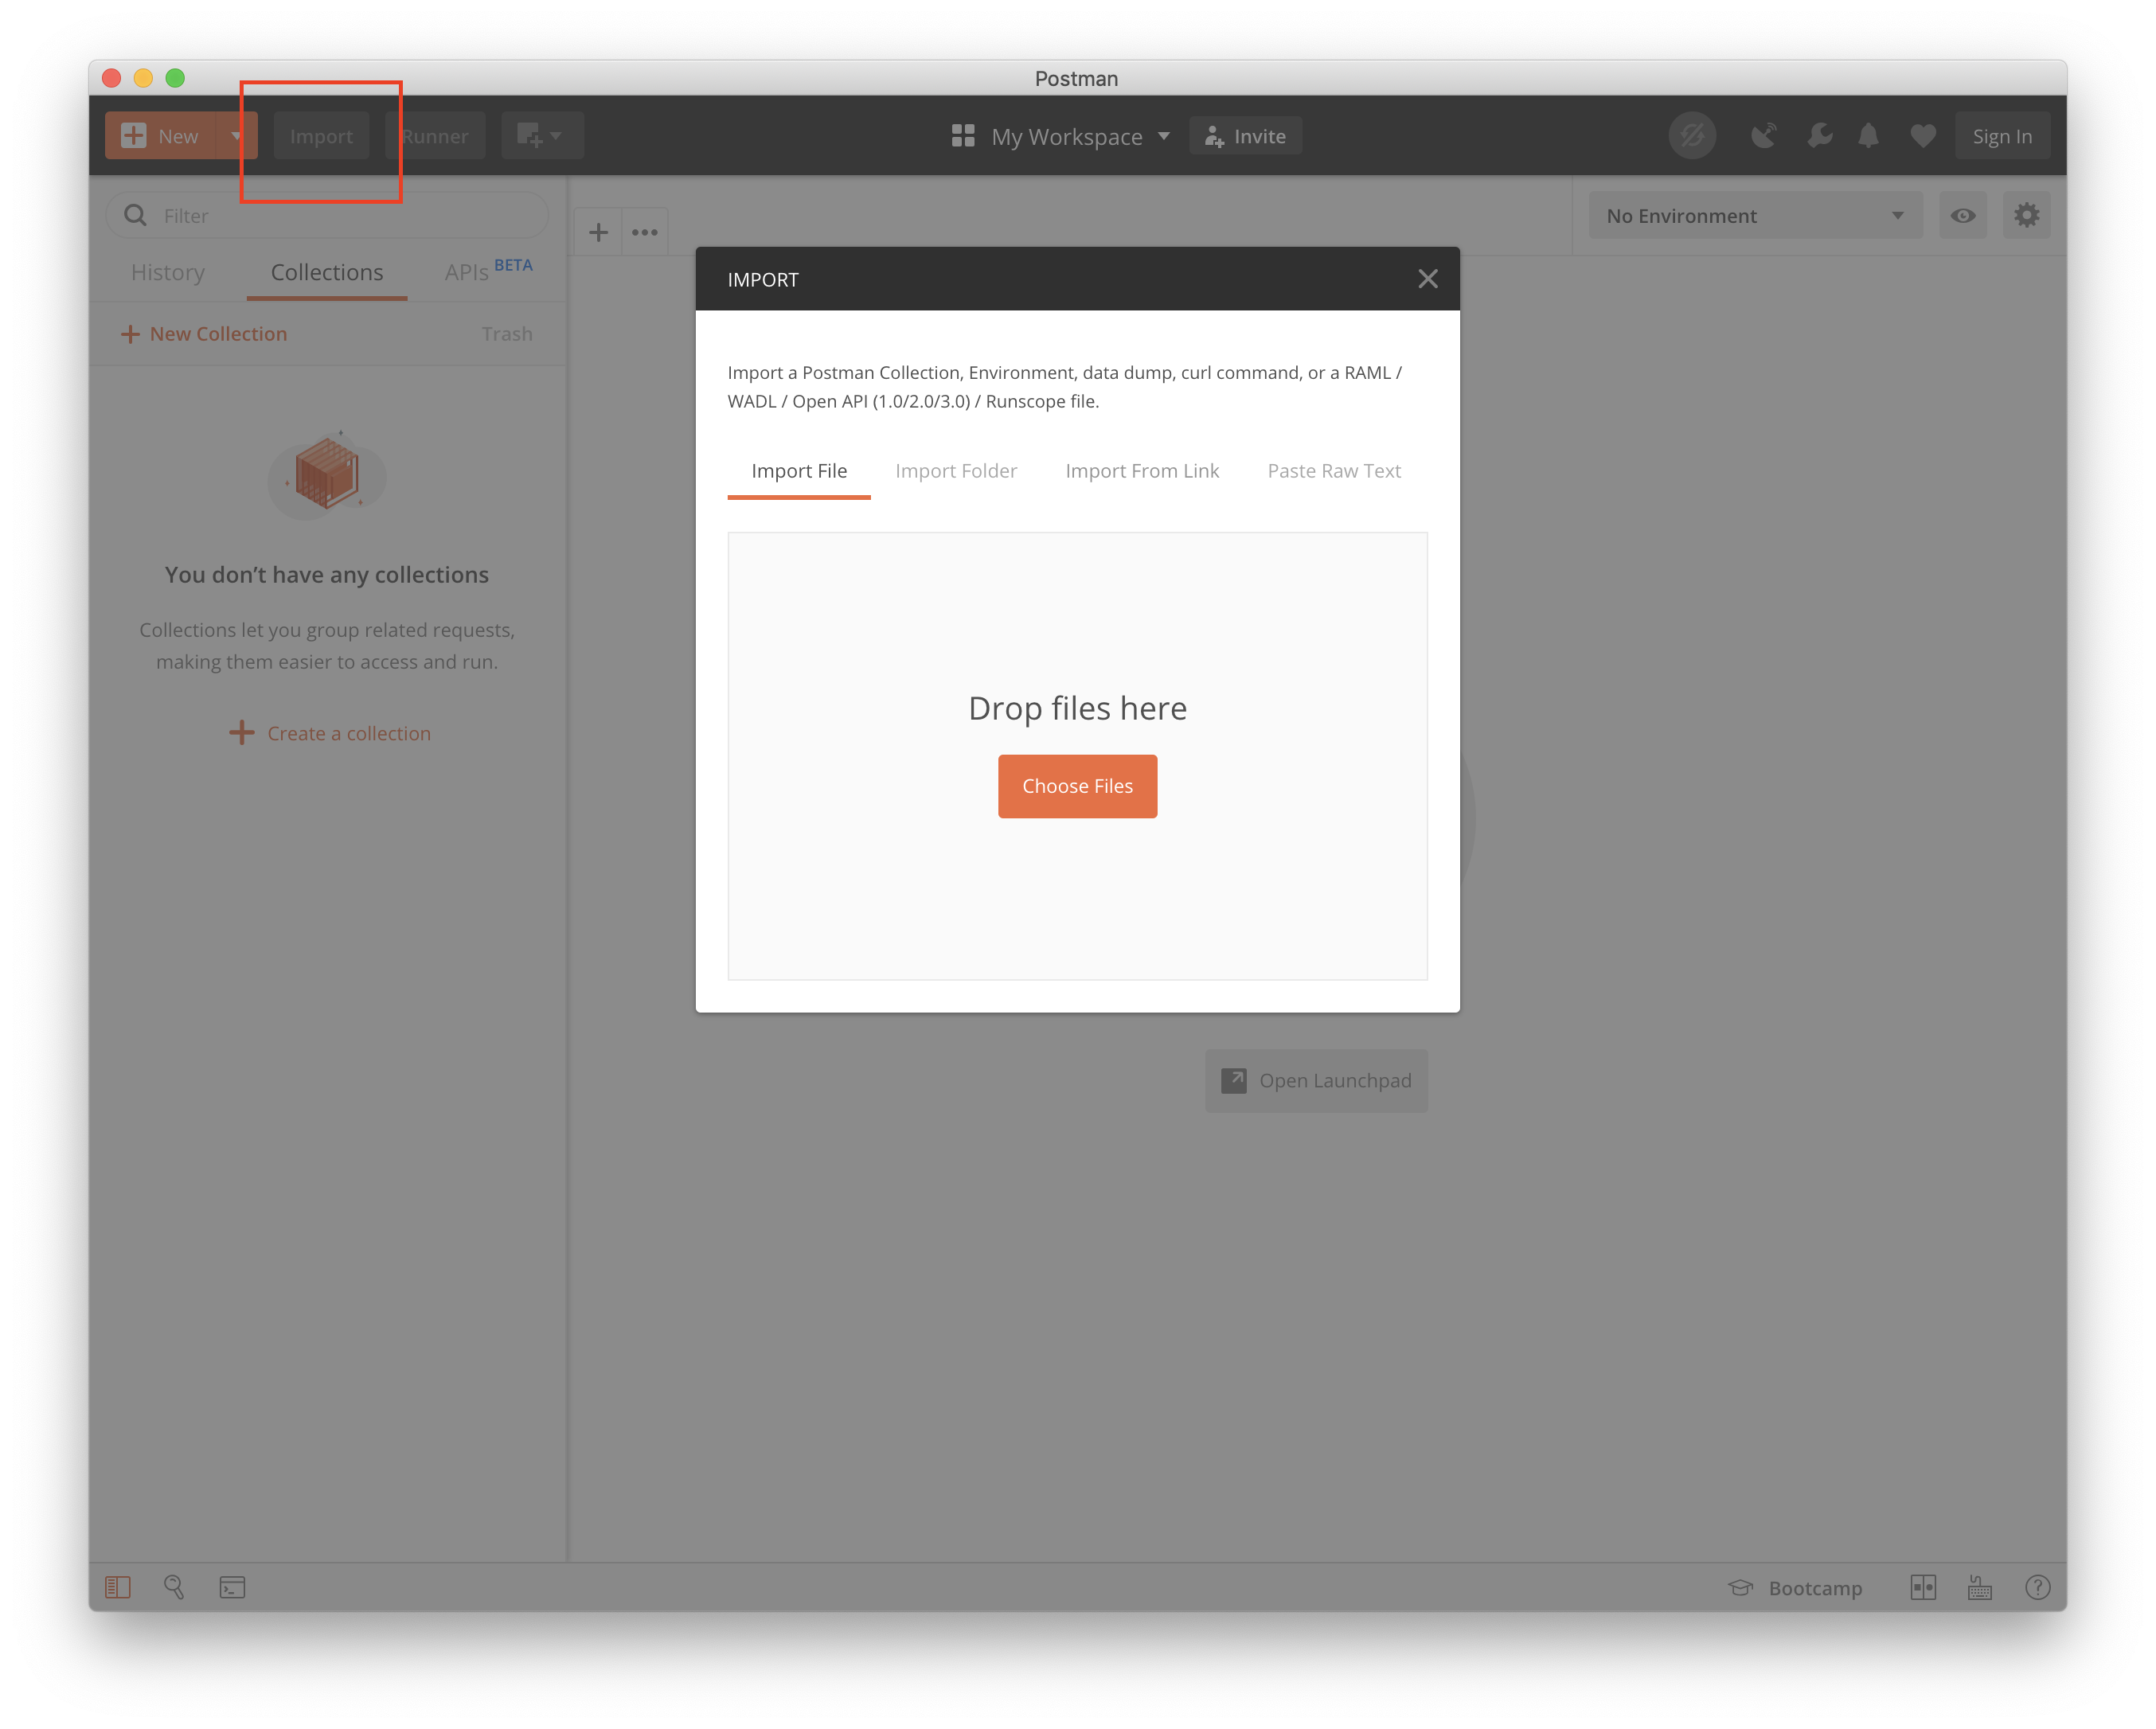
Once this completes successfully, you should see the Healthbot Collection on the left-hand side, with folders containing a number of requests (these will be added to over time). As new requests are added to the collection.json file, you will need to repeat the import process (described above) to avail of these.

At this point we can update the Collection to point to your Healthbot Server by changing the Collection variable server-port and the Basic Auth Credentials to use the correct values for your installation.
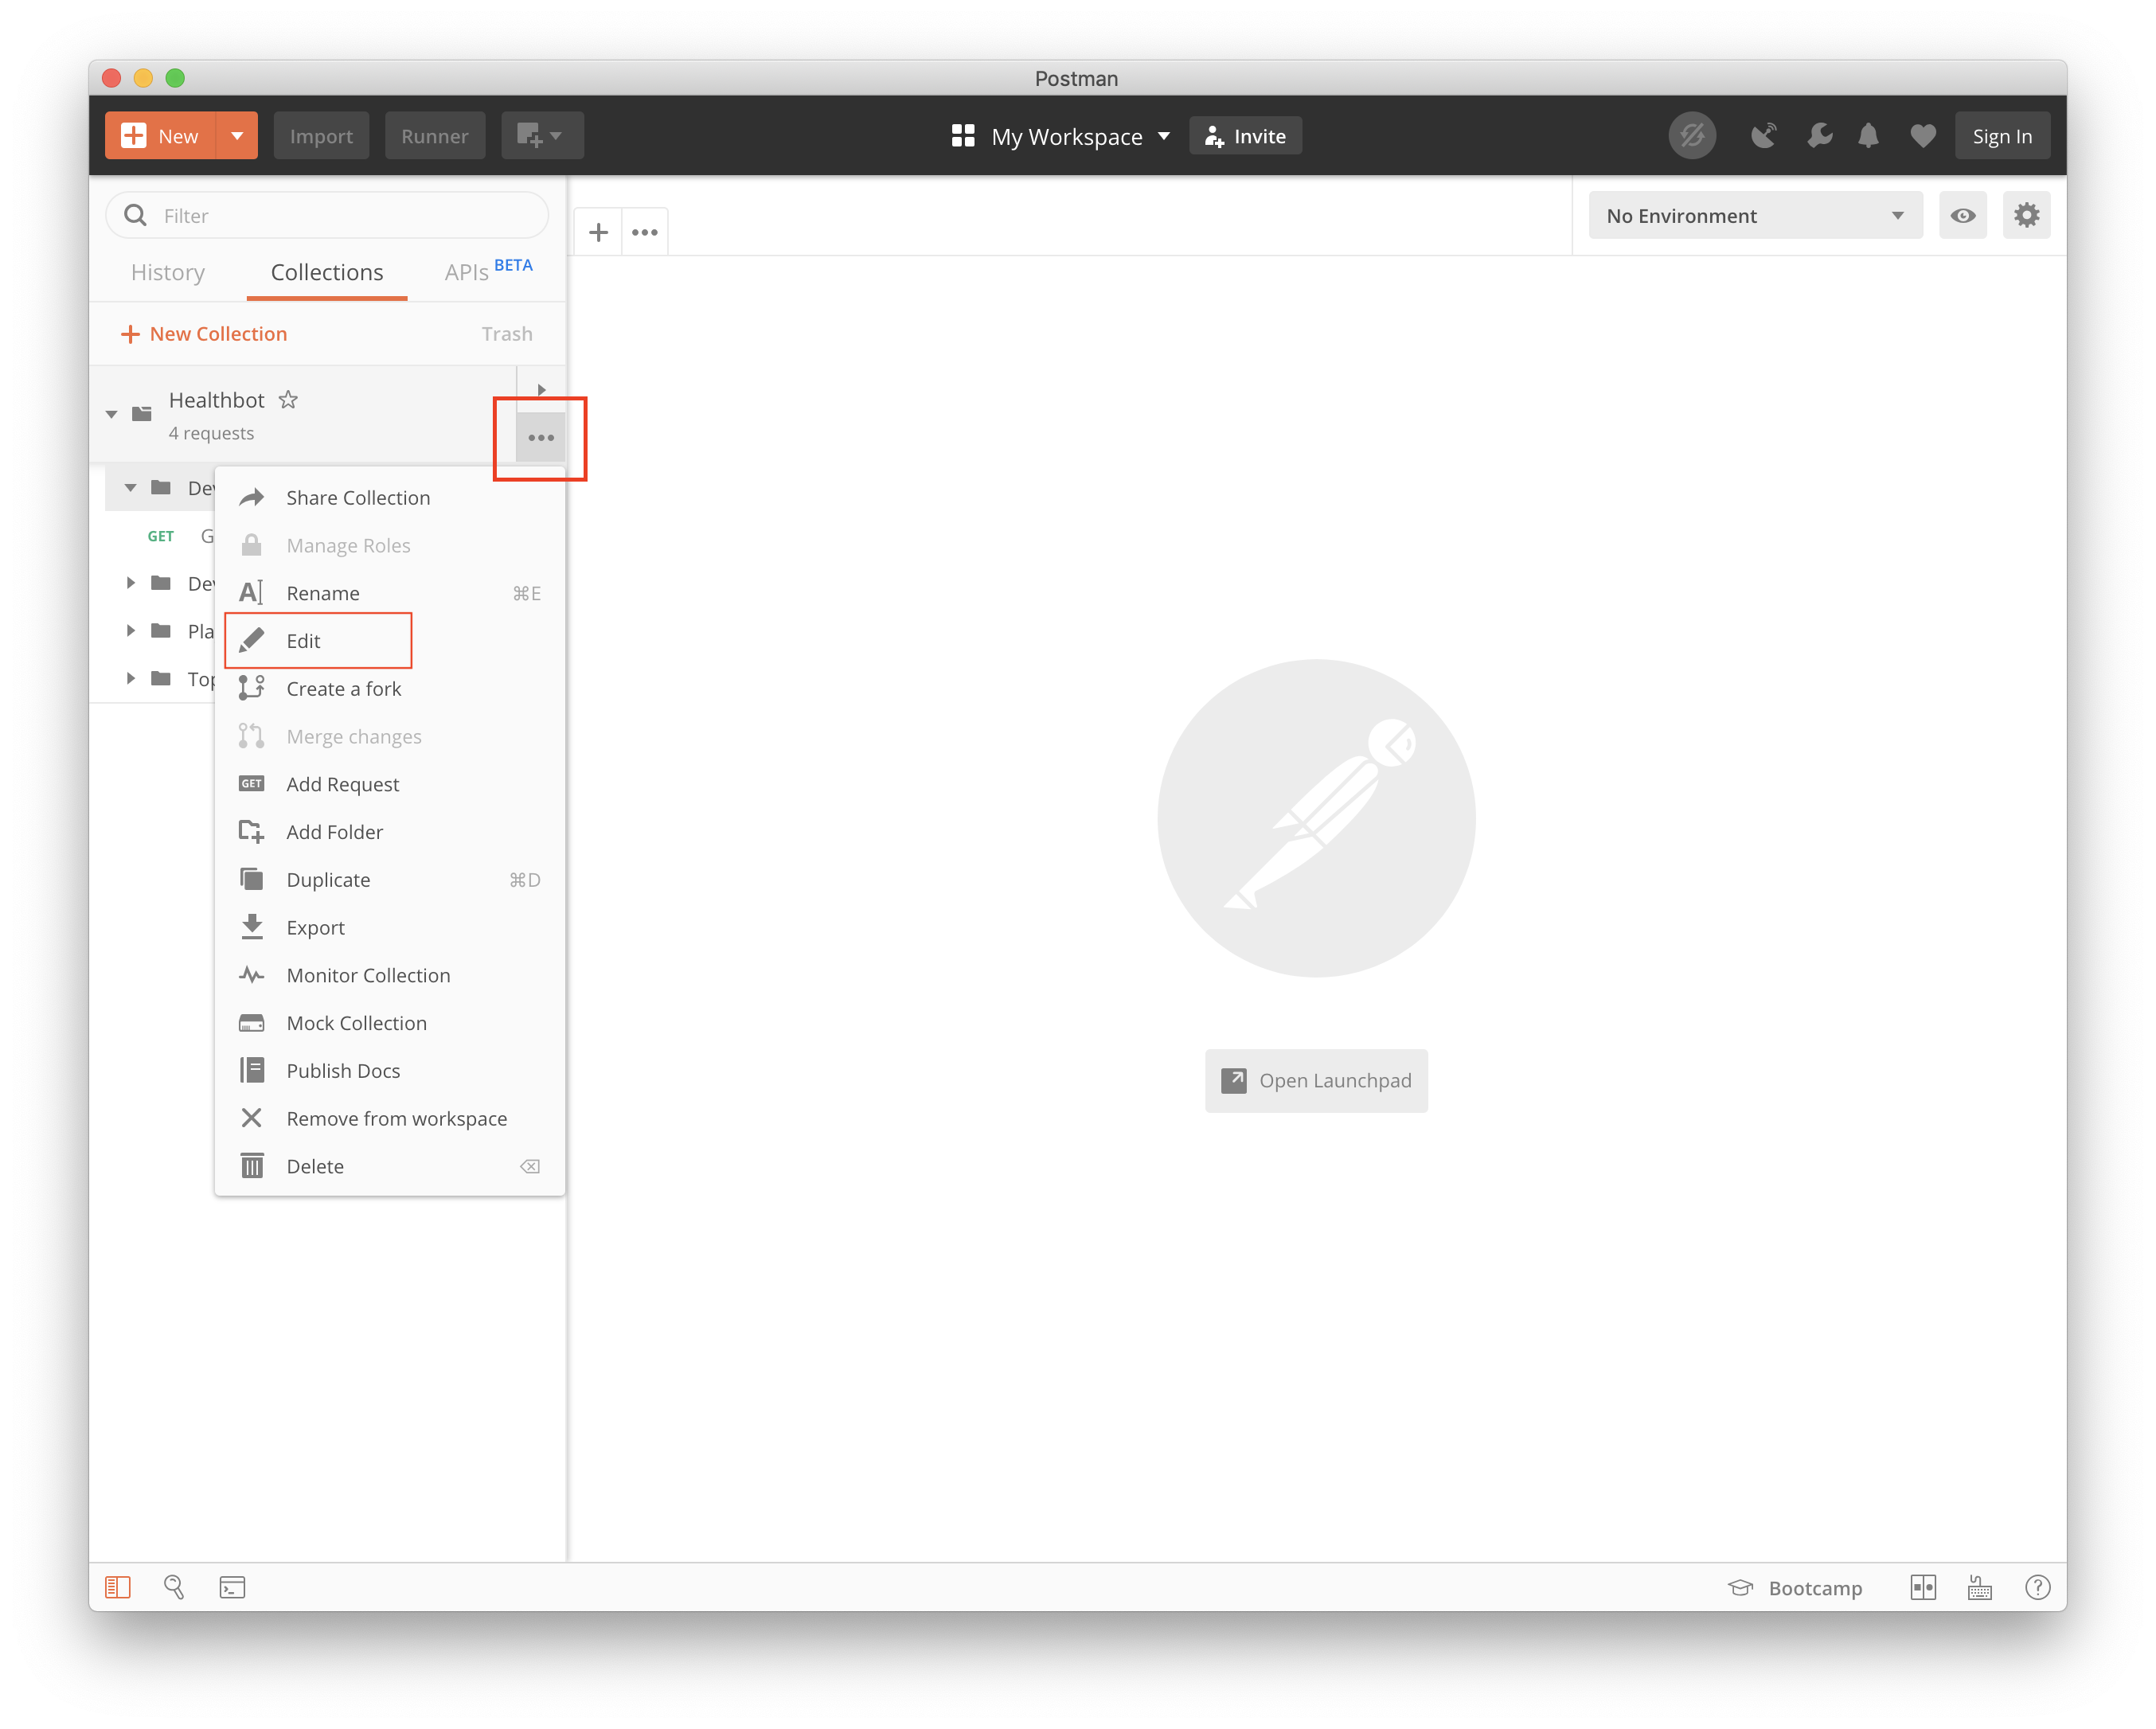
Selecting the ... at the Collection name shows a drop-down menu with an option to edit, selecting this allows you to make global changes to the Collection.
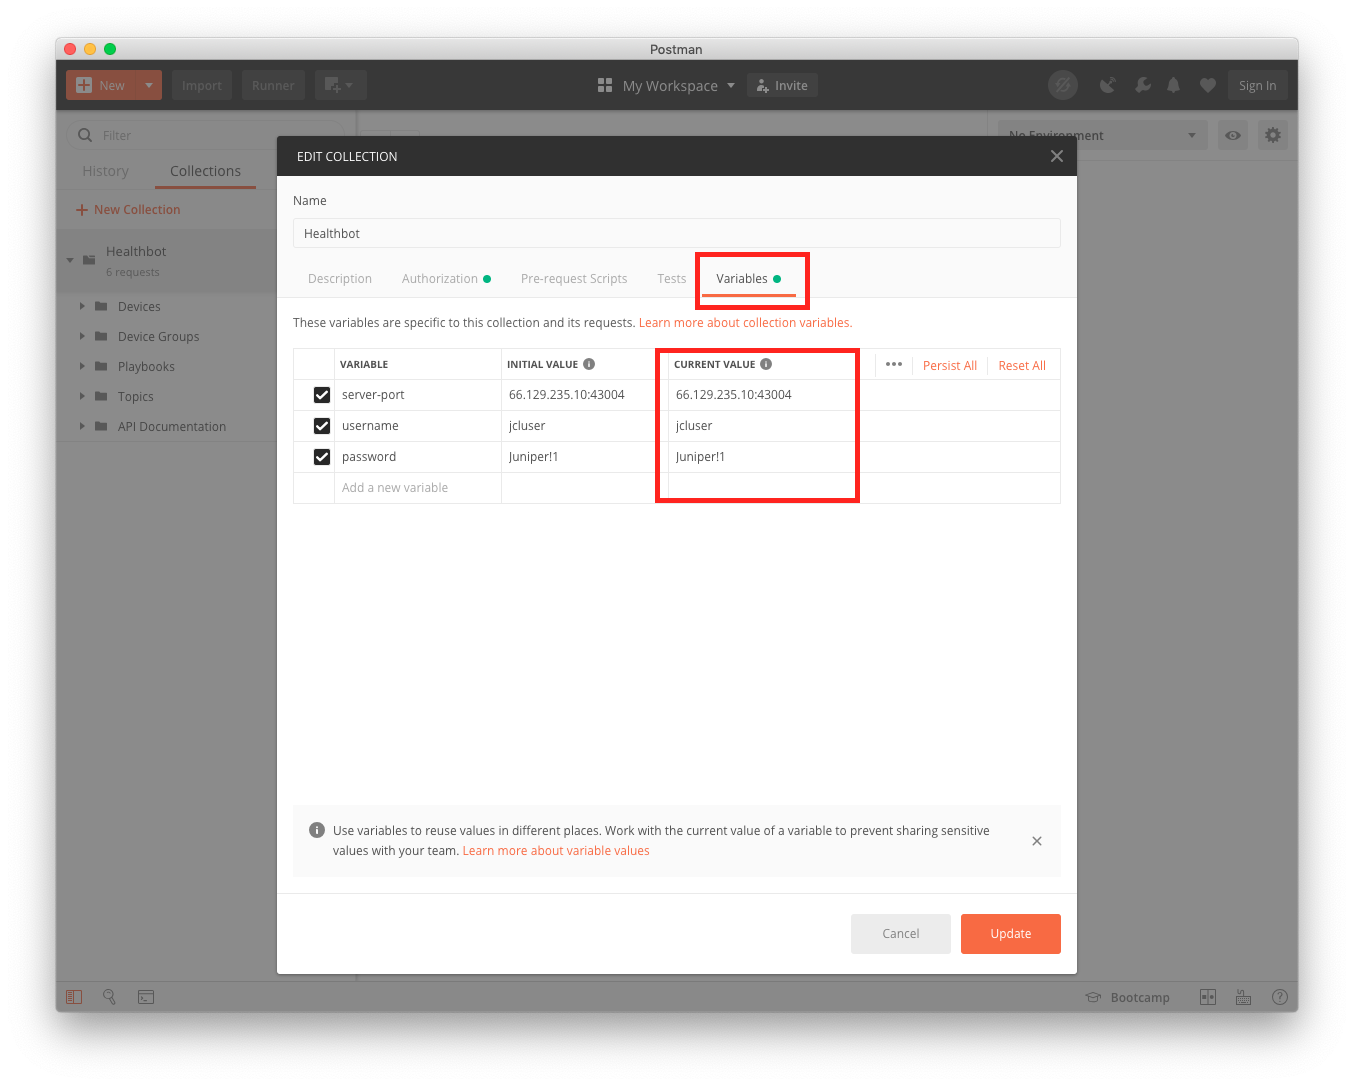
On the screen there is a tab where the Healthbot server:port, username and password can be updated (changes should be made to the Current Value column) to reflect your Healthbot installation. Once this is complete, all requests in this Collection will execute against your Healthbot server using your credentials.
Building an Application
Postman provides a scaffolding solution for generating application code based on Requests. We can use this to create a simple application in a variety of different languages to demonstrate an API call against Healthbot.
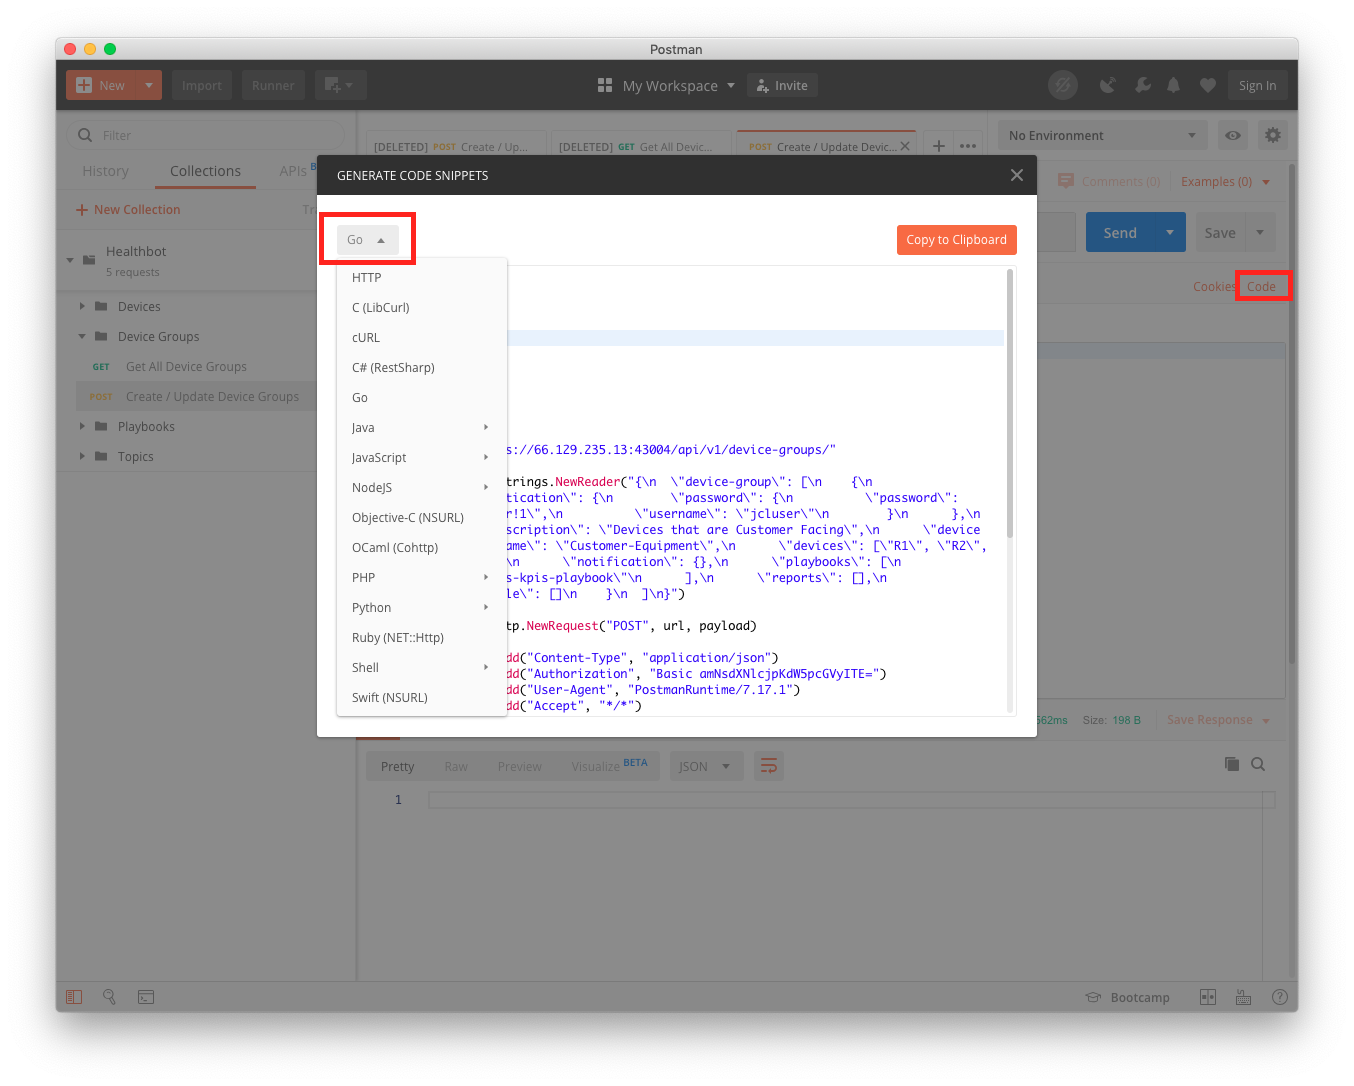
By selecting the code button on the right-hand side of a Postman Request window, we will get a pop-up dialogue where we can select from a number of different languages.
In the screenshot I have selected a Golang example as shown below.
package main

import (
    "fmt"
    "strings"
    "net/http"
    "io/ioutil"
)

func main() {

    url := "https://66.129.235.13:43004/api/v1/device-groups/"

    payload := strings.NewReader("{\n  \"device-group\": [\n    {\n      \"authentication\": {\n        \"password\": {\n          \"password\": \"Juniper!1\",\n          \"username\": \"jcluser\"\n        }\n      },\n      \"description\": \"Devices that are Customer Facing\",\n      \"device-group-name\": \"Customer-Equipment\",\n      \"devices\": [\"R1\", \"R2\", \"R3\"],\n      \"notification\": {},\n      \"playbooks\": [\n        \"chassis-kpis-playbook\"\n      ],\n      \"reports\": [],\n      \"variable\": []\n    }\n  ]\n}")

    req, _ := http.NewRequest("POST", url, payload)

    req.Header.Add("Content-Type", "application/json")
    req.Header.Add("Authorization", "Basic amNsdXNlcjpKdW5pcGVyITE=")
    req.Header.Add("User-Agent", "PostmanRuntime/7.17.1")
    req.Header.Add("Accept", "*/*")
    req.Header.Add("Cache-Control", "no-cache")
    req.Header.Add("Postman-Token", "f536ca40-f0d1-476a-96df-5507e4b23dfe,ca07fa8c-eefc-4cfa-8d84-54516fecca68")
    req.Header.Add("Host", "66.129.235.13:43004")
    req.Header.Add("Accept-Encoding", "gzip, deflate")
    req.Header.Add("Content-Length", "446")
    req.Header.Add("Connection", "keep-alive")
    req.Header.Add("cache-control", "no-cache")

    res, _ := http.DefaultClient.Do(req)

    defer res.Body.Close()
    body, _ := ioutil.ReadAll(res.Body)

    fmt.Println(res)
    fmt.Println(string(body))

}
In this sample code we can see a call to the Healthbot server @ to create a Device Group called Customer-Equipment, containing 3 Devices; R1, R2, R3 using the chassis-kpi-playbook.